
Views: 0 Author: Site Editor Publish Time: 2026-08-21 Origin: Site


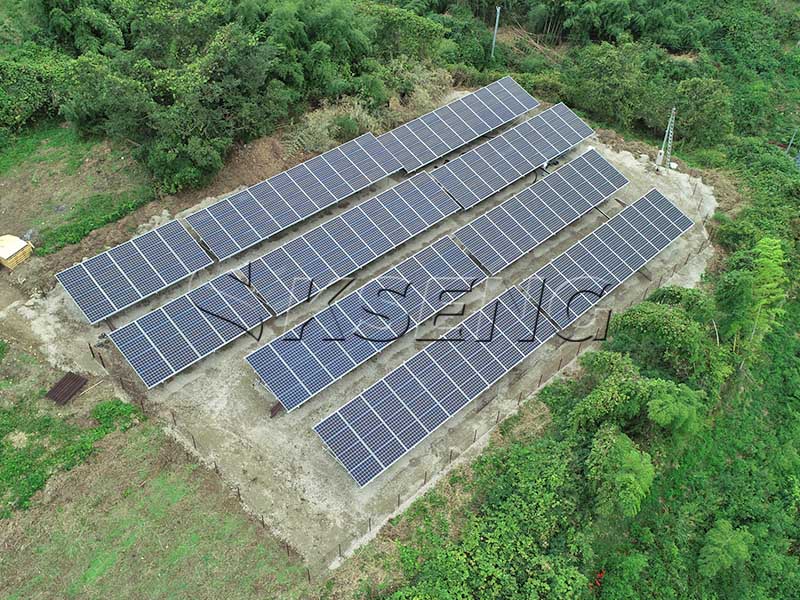
Solar power generation is influenced by much more than the efficiency of photovoltaic modules. The solar mounting system and the overall solar array layout also play an important role in determining how much electricity a PV system can produce throughout its operating life.
A well-designed solar mount layout helps photovoltaic modules receive more sunlight, reduces inter-row shading, improves ventilation, and makes better use of available roof or land area. At the same time, the mounting structure must provide sufficient stability under wind, snow, rain, and other environmental loads.
So, how can a solar mounting layout be optimized for higher power generation?
The key is to balance panel orientation, tilt angle, row spacing, shading control, available installation area, structural requirements, and long-term system performance.
1.Why Solar Mount Layout Matters for Power Generation
Solar panels convert sunlight into electricity, but their ability to capture solar radiation depends heavily on how they are positioned.
A poorly planned layout can result in:
• Unnecessary shading between solar panel rows
• Suboptimal sunlight exposure
• Reduced energy yield
• Poor airflow underneath modules
• Inefficient use of available installation space
• Higher structural and installation costs
In contrast, a carefully engineered solar panel mounting system can help maximize solar exposure while maintaining structural safety and installation efficiency.
For this reason, solar mount layout should be considered during the early stages of PV system design rather than treated as an installation detail.
2.Optimize Solar Panel Orientation
Panel orientation, also known as azimuth, determines the direction in which solar modules face.
In the Northern Hemisphere, south-facing fixed-tilt PV systems are generally a strong starting point for maximizing annual solar energy production. However, the ideal orientation depends on the project's location, electricity consumption profile, roof conditions, land availability, and system objectives.
For example, a commercial building may have an east-west roof configuration. Instead of forcing all modules toward the south, an east-west solar mounting layout may allow more modules to be installed within the available roof area.
This means that maximum annual energy per panel is not always the same as maximum total energy from the site.
A professional layout should therefore evaluate:
• Geographic location
• Solar path
• Roof orientation
• Land availability
• Electricity demand profile
• Module dimensions
• Inverter configuration
• Expected shading
• Installation and maintenance requirements
The best solar array layout is the one that optimizes the entire system rather than focusing on a single parameter.
3.Choose the Right Solar Panel Tilt Angle
Tilt angle is another critical factor in solar layout optimization.
The ideal angle allows PV modules to receive a high level of solar irradiance throughout the year. For fixed systems, latitude is often used as a starting reference, but the final angle should also consider seasonal solar conditions, roof geometry, wind loads, snow loads, row spacing, and installation costs.
A steeper tilt angle can improve solar exposure under certain conditions, but it can also increase the shadow cast by one row onto another. This means that simply increasing the tilt angle does not necessarily increase total site-level energy production.
The relationship can be summarized as:
Higher Tilt → Potentially Better Solar Exposure → Potentially Longer Shadows → Greater Row Spacing Requirement
Therefore, solar mounting design should optimize tilt angle and row spacing together.
4.Optimize Row-to-Row Spacing to Reduce Shading
One of the most important considerations in a ground-mounted or flat-roof PV project is inter-row shading.
When the sun is low in the sky, particularly during winter mornings and afternoons, the front row of panels can cast shadows onto the row behind it. Even partial shading can affect energy production depending on module and system configuration.
To reduce shading losses, designers should calculate row spacing according to:
• Module length and width
• Tilt angle
• Panel orientation
• Site latitude
• Solar elevation angle
• Seasonal sunlight conditions
• Required shading tolerance
• Available land or roof area
However, maximizing row spacing is not always the best solution.
If rows are placed too far apart, shading losses may decrease, but the number of panels that can fit on the site will also decrease. If rows are too close, the system may accommodate more modules but experience greater shading.
The goal is therefore to find the optimal balance between energy yield per module and installed capacity per square meter.
This is particularly important for utility-scale solar farms, where land utilization directly affects project economics.
5.Conduct a Detailed Shading Analysis
Shading analysis should be completed before finalizing the solar array layout.
Potential shading sources include:
• Adjacent solar panel rows
• Buildings
• Trees
• Utility poles
• Chimneys
• HVAC equipment
• Parapets
• Terrain
• Nearby structures
For rooftop systems, designers should map obstacles and determine how their shadows change throughout the day and across different seasons.
For ground-mounted solar projects, terrain analysis becomes especially important. Hills, slopes, trees, and surrounding structures can create complex shading patterns.
A professional solar shading analysis can help identify the areas with the greatest solar resource and guide the placement of modules.
The result is a layout that does not simply maximize the number of panels but maximizes useful solar generation.
6.Leave Enough Space for Airflow and Cooling
Solar panels operate more efficiently when excessive heat can dissipate.
A solar mounting structure that provides sufficient clearance beneath the modules can improve natural airflow. Better ventilation can help limit temperature buildup, especially in hot climates.
This is another reason why the mounting system should not be viewed simply as a structural support.
The layout should consider:
Panel Position + Mounting Height + Airflow + Local Climate
Adequate ventilation can contribute to more stable operating conditions and long-term system performance.
7.Select the Right Solar Mounting Structure
The solar mounting structure must be matched to the project type.
Common applications include rooftop solar mounting, ground-mounted solar, and solar tracking systems.
Rooftop PV systems must consider:
• Roof type
• Roof load capacity
• Existing roof slope
• Waterproofing
• Wind loads
• Available installation area
• Maintenance access
Tile roofs, metal roofs, flat roofs, and membrane roofs may require different mounting approaches.
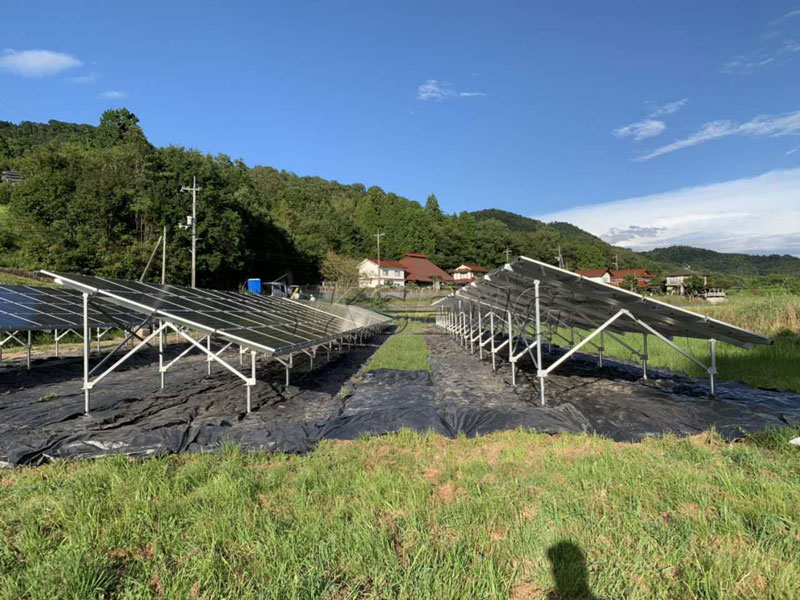
Ground-mounted systems provide greater flexibility in orientation, tilt, row spacing, and array configuration.
The design should consider:
• Soil conditions
• Terrain
• Foundation type
• Wind and snow loads
• Land utilization
• Vegetation
• Drainage
• Equipment access
For large-scale solar projects, tracking systems can be considered when the additional energy yield justifies the added structural, mechanical, and maintenance requirements.
Single-axis trackers can follow the sun throughout the day and are increasingly used in utility-scale applications.
A properly designed solar tracking system can help optimize energy yield per unit of land while maintaining an efficient array configuration.
8.Optimize Panel Density Without Sacrificing Energy Yield
One common mistake in solar array design is focusing only on how many modules can fit on a site.
More panels do not automatically mean proportionally more electricity.
For example, increasing panel density may create:
• More inter-row shading
• Reduced ventilation
• More difficult maintenance access
• More complicated cable routing
• Higher local temperature
• Increased installation constraints
A better approach is to evaluate the relationship between:
Installed Capacity + Solar Irradiance + Shading Loss + Land/Roof Utilization + O&M Requirements
This creates a more realistic optimization target for commercial and utility-scale projects.
The optimal solar mount layout is not necessarily the layout with the highest number of modules. It is the layout that delivers the best combination of energy yield, reliability, land utilization, structural performance, and project economics.
9.Consider Module Size and Mounting Orientation
Modern PV modules are becoming larger and more powerful. Therefore, the solar mounting structure must be designed around the actual module dimensions and installation configuration.
Designers should determine whether modules should be installed in:
• Portrait orientation
• Landscape orientation
• Single-row configurations
• Multi-row configurations
• 2P tracker configurations
• East-west rooftop configurations
The choice affects rail length, support spacing, row arrangement, cable management, installation time, and land utilization.
For large-format PV modules, the mounting structure should provide sufficient structural support while maintaining an efficient layout and streamlined installation process.
10.Maintain Structural Stability for Long-Term Performance
Power generation optimization is not only about the first year of operation.
A solar mounting system may be expected to operate for decades. If the structure deforms, loosens, corrodes, or shifts over time, the original panel orientation may no longer be maintained.
Wind, snow, thermal expansion, vibration, and corrosion can all affect mounting structures.
Therefore, the solar mount layout should be designed according to the site's environmental conditions.
Key structural considerations include:
• Wind speed
• Snow load
• Seismic conditions
• Corrosion environment
• Foundation conditions
• Material selection
• Fastener quality
• Structural load calculations
A durable mounting structure helps maintain module alignment and system performance throughout the project's operating life.
11.Balance Energy Generation and Installation Cost
The highest theoretical energy yield does not always produce the best project return.
Increasing tilt angle, widening row spacing, adding trackers, or using more complex mounting structures can increase energy production, but these options may also increase:
• Material consumption
• Foundation requirements
• Land requirements
• Installation labor
• Maintenance costs
• Engineering complexity
Therefore, professional solar layout optimization should consider both energy yield and total project cost.
For example, a fixed-tilt system may be more suitable for a project where simplicity, reliability, and low maintenance are priorities, while a tracking system may be attractive for a utility-scale project where additional energy yield can justify the additional investment.
The right solution depends on the project's location, scale, electricity price, land cost, and financial objectives.
12.Use Professional Solar Mounting Design
Solar mount layout optimization requires more than simply placing panels on a roof or piece of land.
A professional design process typically includes:
Site survey and geographical analysis
Solar resource assessment
Roof or terrain evaluation
Shading analysis
Panel orientation optimization
Tilt angle selection
Row spacing calculation
Mounting structure selection
Wind and snow load analysis
Electrical and maintenance considerations
Energy yield simulation
Final structural layout
Using this approach helps project developers avoid common design problems and achieve a better balance between energy production, structural safety, and project cost.
13.How Kseng Helps Optimize Solar Mounting Layouts
As a solar mounting system manufacturer, Kseng provides mounting solutions for residential, commercial, industrial, and utility-scale PV applications.
Its product portfolio covers rooftop mounting systems, ground mounting systems, solar carports, agricultural PV structures, floating solar solutions, and tracking systems.
Kseng also provides customized structural design support based on project conditions, including panel dimensions, site geography, wind and snow loads, foundation requirements, and layout objectives.
For large-scale projects, a customized mounting solution can help optimize:
• Solar panel orientation
• Tilt angle
• Row spacing
• Land utilization
• Structural stability
• Installation efficiency
• Long-term durability
This project-specific approach is particularly valuable when site conditions make standard mounting layouts unsuitable.
Conclusion
Optimizing a solar mount layout is one of the most effective ways to improve the overall performance of a photovoltaic system.
The key is not simply to install more solar panels. Instead, designers should optimize the entire solar array by balancing orientation, tilt angle, row spacing, shading, airflow, module configuration, structural stability, land utilization, and project cost.
For rooftop projects, the layout should maximize available roof space while maintaining structural safety and minimizing shading.
For ground-mounted solar farms, row spacing, terrain, solar geometry, and land utilization become even more important.
For large utility-scale projects, tracking systems can provide another option for increasing energy yield.
A professionally engineered solar mounting system provides the foundation for maintaining the right panel position and reliable performance over the long term.
By combining accurate site analysis, optimized solar panel layout, and a durable mounting structure, solar project developers can create PV systems designed for higher energy generation and better long-term value.



